There’s something instantly cozy about these little bites—you get that warm hug of holiday spices in every nibble. The Gingerbread Truffles (Paleo Gluten-Free) Recipe packs all those gingerbread flavors without any grains or gluten, making it a perfect festive treat that feels both indulgent and wholesome.

Jump to:
- Why You'll Love This Recipe
- Ingredients & Why They Work
- Make It Your Way
- Step-by-Step: How I Make Gingerbread Truffles (Paleo Gluten-Free) Recipe
- Top Tip
- How to Serve Gingerbread Truffles (Paleo Gluten-Free) Recipe
- Make Ahead and Storage
- Frequently Asked Questions:
- Final Thoughts
- Gingerbread Truffles (Paleo Gluten-Free) Recipe
Why You'll Love This Recipe
I have to admit, the very first time I tried making these Gingerbread Truffles, I was hooked instantly. What makes this treat stand out is how it captures the soul of gingerbread in a little bite-sized ball that’s easy to snack on or share—without the gluten or any processed junk. You don’t feel the least bit deprived here.
- Perfectly Paleo & Gluten-Free: Uses almond and coconut flour keeping things wholesome and grain-free.
- Deliciously Spiced: Warm ginger and cinnamon really shine, making these truffles taste like a cozy holiday classic.
- Easy to Make: No fancy equipment or complicated steps—just simple mixing, chilling, and dipping.
- Customizable: You can easily swap sweeteners or skip the chocolate if you prefer a lighter bite.
Ingredients & Why They Work
Each ingredient in the Gingerbread Truffles (Paleo Gluten-Free) Recipe plays a key role in texture, flavor, and keeping things healthy. When you shop, aim for quality, especially with your almond butter and spices since they really make a difference here.
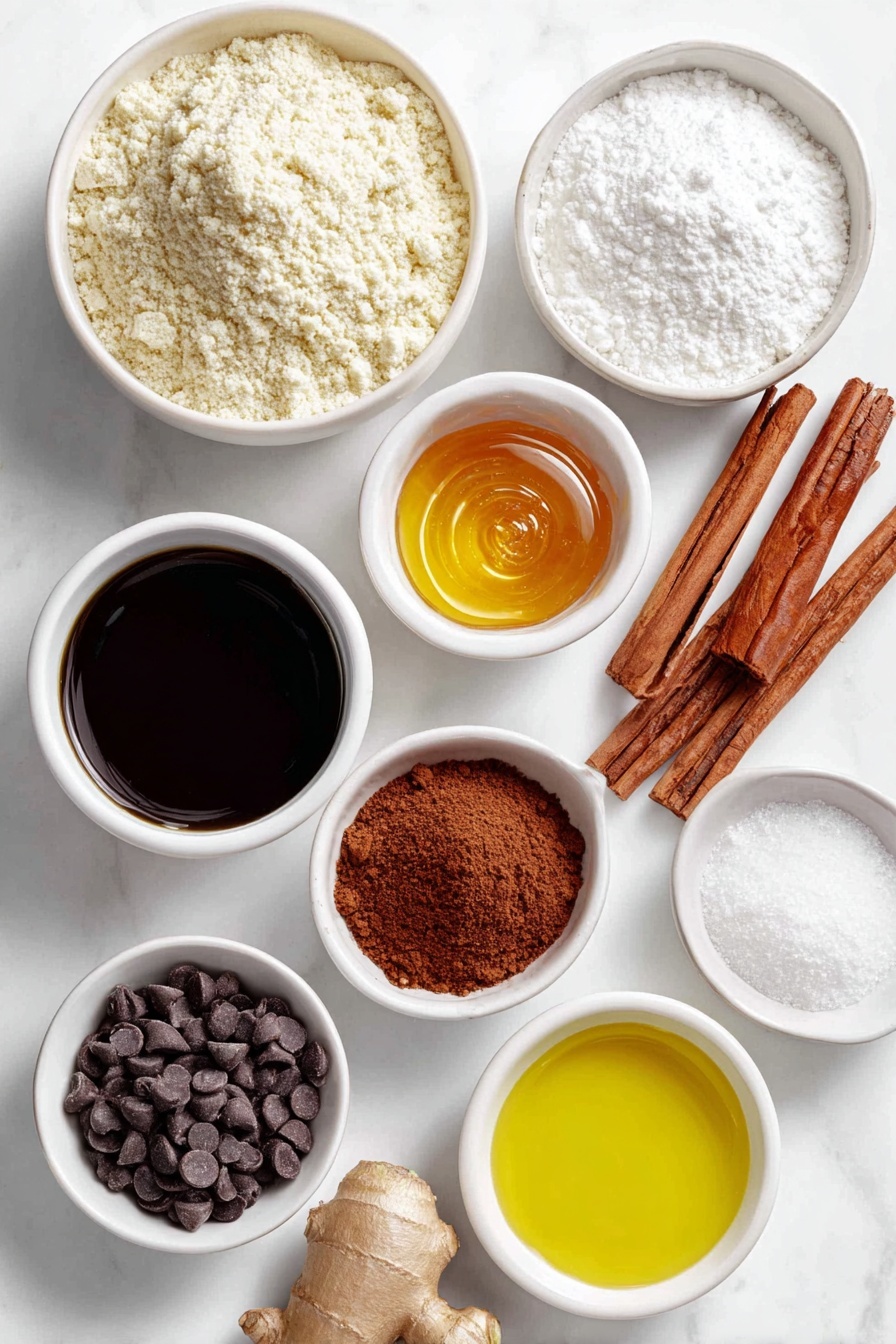
- Almond Flour: Provides a tender, nutty base and keeps these gluten-free.
- Coconut Flour: Adds absorbency and helps balance the moist almond butter, but you can tweak the amount depending on your almond flour.
- Ground Ginger: The star spice that gives the truffles that authentic gingerbread warmth.
- Cinnamon: Pairs beautifully with ginger and deepens the holiday feel.
- Salt: Just a pinch to elevate all the flavors.
- Almond Butter: A creamy, rich binder that also boosts protein and healthy fats.
- Honey: Natural sweetness with a floral note that balances the spices.
- Molasses: That classic gingerbread ingredient giving body, color, and a deep cozy flavor.
- Chocolate Chips (optional): Dark or semi-sweet melt perfectly with a bit of coconut oil to coat the truffles in a luscious finish.
Make It Your Way
I love to personalize these truffles depending on the season or my mood. Sometimes I add a pinch of cloves or nutmeg for extra spice, or swap the honey for maple syrup to keep it vegan-friendly. Feel free to play around—you’ll find your favorite twist in no time!
- Variation: For a little extra crunch, sprinkle finely chopped crystallized ginger on top after dipping in chocolate. It’s an unexpected touch that brings a lively zing.
- Sweetener Swap: Swap honey with maple syrup or agave if you want a vegan version—just keep an eye on the dough consistency since some liquid sweeteners vary.
- Chocolate-Free: Skip the chocolate dip and roll truffles in shredded coconut or cocoa powder for different flavor profiles.
Step-by-Step: How I Make Gingerbread Truffles (Paleo Gluten-Free) Recipe
Step 1: Mix Dry Ingredients with Love
I start with a large bowl and whisk together almond flour, coconut flour, ground ginger, cinnamon, and a pinch of salt. Make sure you break up any lumps in the flours so the texture is nice and even—this helps the truffles come together smoothly later.
Step 2: Combine the Wet Ingredients Separately
In a smaller bowl, blend the almond butter with honey and molasses until silky smooth. This mixture smells incredible and brings that deep, rich flavor to the truffles. I usually give it a little extra stir to ensure the molasses is fully incorporated.
Step 3: Bring It Together
Pour your wet mixture into the dry ingredients and mix well—don’t be shy, I often use my hands here. It’s easier to feel when everything is fully combined. The dough should feel slightly sticky but firm enough to shape. If it’s too wet, add a bit more almond flour, a spoonful at a time.
Step 4: Chill Before Rolling
Cover the dough and pop it into the fridge for about 30 minutes. This step is key—it firms up the mixture so your truffles hold their shape when rolling, plus it makes the process much cleaner and more satisfying.
Step 5: Melt Chocolate for Dipping (Optional but Oh-So-Good)
While the dough chills, melt your chocolate chips with a teaspoon of coconut oil in short bursts of 20 seconds in the microwave—stirring well after each—to keep the chocolate smooth and prevent burning. The coconut oil ensures a nice glossy finish on your truffles.
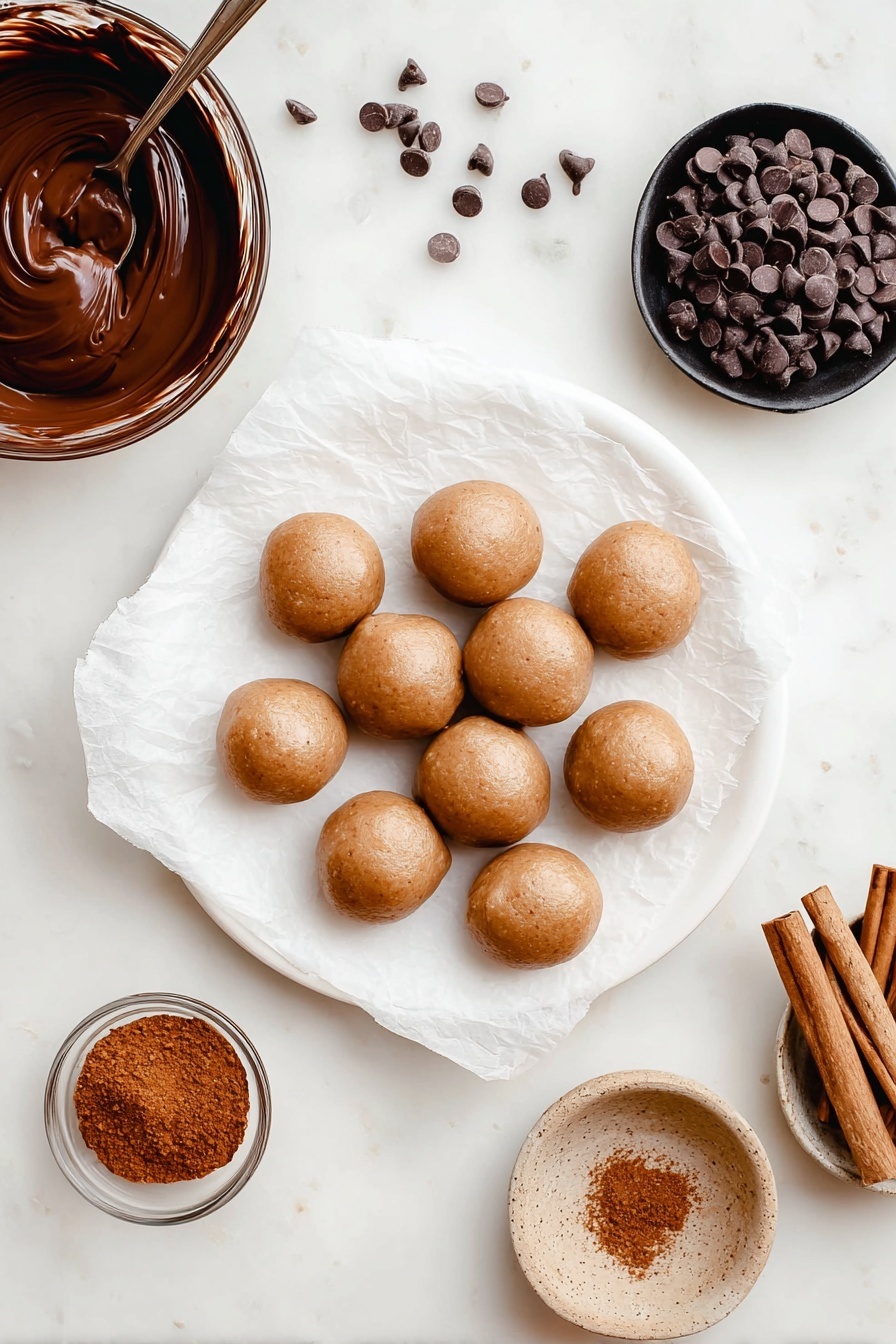
Step 6: Roll, Dip, and Set
Scoop small portions and roll between your palms to form balls about the size of a walnut. Then dip each truffle into the melted chocolate, fishing them out with a fork and tapping off excess chocolate against the bowl. Place them on parchment paper and pop back in the fridge or freezer for at least 30 minutes to set.
Top Tip
From my many batches of these Gingerbread Truffles, a few key tips have really made all the difference to reliable success and rich flavor. It’s all about patience with chilling and the balance of wet to dry ingredients.
- Chilling is Crucial: Don’t skip the fridge step before rolling—this keeps the dough manageable and less messy.
- Mix With Your Hands: Using your hands helps you feel when everything is perfectly combined, preventing dry or overly sticky spots.
- Slow & Careful Chocolate Melting: Melting chocolate gently in short bursts avoids seizing and keeps it silky smooth for coating.
- Don’t Overdo the Coconut Flour: A little goes a long way—you want the right balance for soft, tender truffles.
How to Serve Gingerbread Truffles (Paleo Gluten-Free) Recipe
Garnishes
I love sprinkling a pinch of finely chopped crystallized ginger or a dusting of cinnamon over the chocolate-coated truffles. It adds a festive touch and a little extra zing. Alternatively, chopped toasted nuts or shredded unsweetened coconut give a lovely texture contrast.
Side Dishes
These truffles are perfect alongside a hot cup of chai tea or a paleo-friendly latte. I’ve also served them with a small bowl of mixed nuts and fresh fruit during holiday gatherings—they make an elegant nibble that’s easy to pop in your mouth between conversations.
Creative Ways to Present
For holiday gifts, I like packaging these truffles in small mason jars layered with parchment paper or in decorated tins with a sprig of fresh rosemary or cinnamon stick tied on top. They look adorable and feel so thoughtful when gifted this way.
Make Ahead and Storage
Storing Leftovers
I usually store leftover truffles in an airtight container in the fridge, where they stay fresh for about a week. The cold helps keep their shape and intensifies the flavors—just be sure to bring them to room temperature a few minutes before enjoying for the best texture.
Freezing
These freeze beautifully! I place them in a single layer on a baking sheet to freeze solid, then transfer to a freezer-safe bag or container. They keep well for up to 3 months—perfect for making early ahead of holiday parties or gifting season.
Reheating
No need to fully reheat—just let frozen truffles thaw at room temperature for about 10-15 minutes. This preserves the texture and flavor better than microwaving, which can make them too soft or unevenly warm.
Frequently Asked Questions:
Absolutely! They use almond and coconut flours instead of grains, and natural sweeteners like honey and molasses—no gluten, no refined sugars here.
Yes! The chocolate coating is optional. You can simply roll the truffles in shredded coconut, chopped nuts, or cocoa powder for a delicious variation.
Stored properly in the fridge, they stay fresh for up to a week. If frozen, they can last for several months without losing flavor or texture.
Definitely! Cashew butter or sunflower seed butter work well as alternatives; just make sure they are smooth and unsweetened for best results.
Final Thoughts
These Gingerbread Truffles (Paleo Gluten-Free) Recipe have become my go-to treat when I want something sweet but still wholesome. The combination of spices with almond butter and that hint of molasses just works so well—and the ease of making them means you can whip them up even on busy days. I can’t wait for you to try them and discover your own little holiday favorite.
Print
Gingerbread Truffles (Paleo Gluten-Free) Recipe
- Prep Time: 40 minutes
- Cook Time: 0 minutes
- Total Time: 40 minutes
- Yield: 12 truffles 1x
- Category: Dessert
- Method: No-Cook
- Cuisine: American
- Diet: Gluten Free
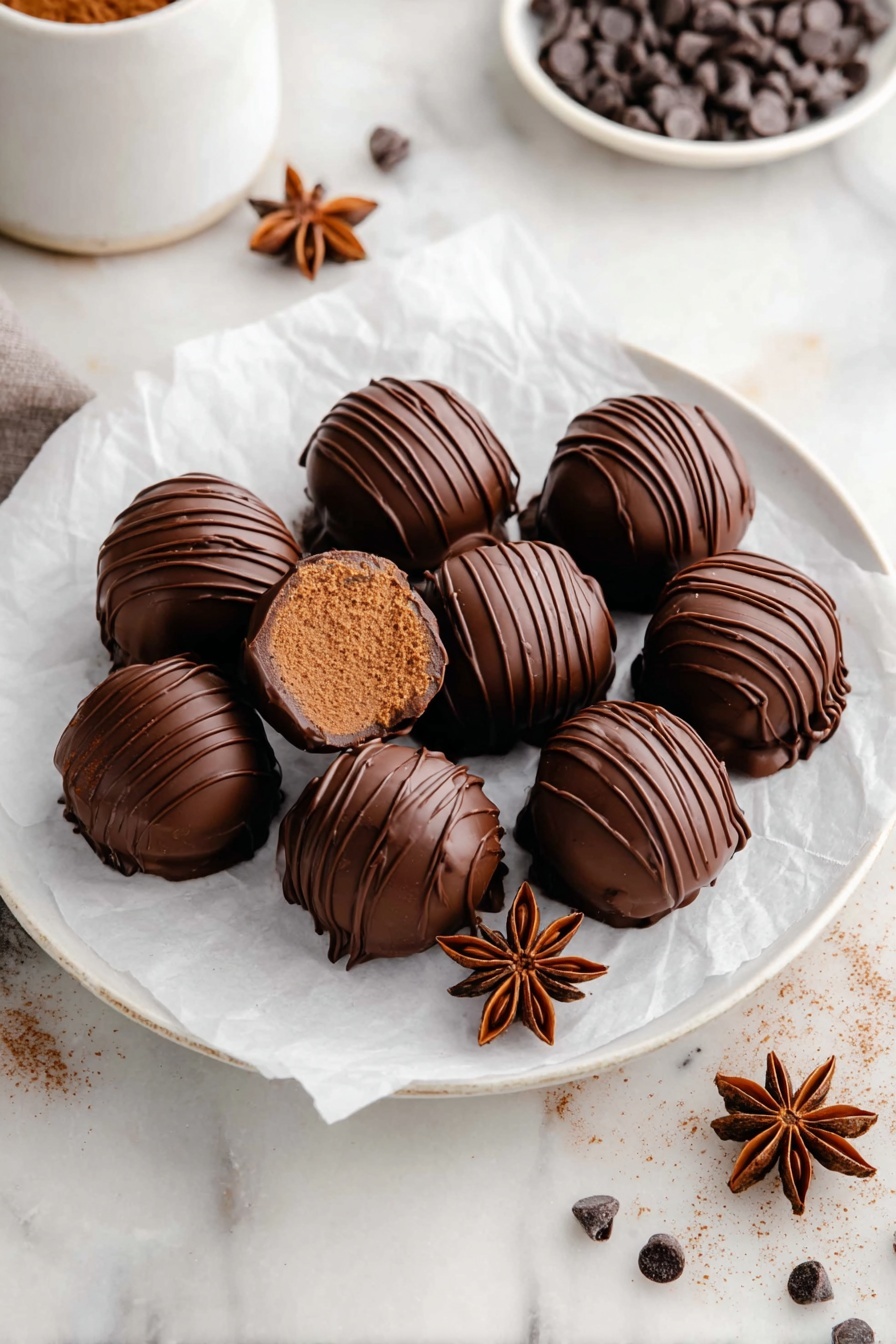
Description
These Gingerbread Truffles are a delicious paleo and gluten-free treat perfect for the holiday season. Made with almond flour, warming spices, almond butter, honey, and molasses, then dipped in rich chocolate, they make for a delightful snack or gift.
Ingredients
Dry Ingredients
- ½ cup almond flour
- 3 tbsp coconut flour (or about ¼-⅓ cup more almond flour)
- 1 tsp ground ginger
- 1 tsp cinnamon
- ¼ tsp salt
Wet Ingredients
- ½ cup almond butter
- 2 tbsp honey
- 2 tbsp molasses
For Dipping (Optional)
- 1 cup chocolate chips
- 1 tsp coconut oil
Instructions
- Mix Dry Ingredients: In a large bowl, combine the almond flour, coconut flour, ground ginger, cinnamon, and salt thoroughly.
- Mix Wet Ingredients: In a separate small bowl, stir together the almond butter, honey, and molasses until smooth and well combined.
- Combine Mixtures: Add the wet ingredients into the dry ingredients bowl and mix until a dough forms; using your hands helps to ensure everything is fully incorporated.
- Chill the Dough: Place the dough in the refrigerator and chill for 30 minutes to firm up, making it easier to roll.
- Melt Chocolate: While the dough chills, melt the chocolate chips with coconut oil in a microwave-safe bowl, heating in 20-second intervals and stirring between each to avoid burning until completely smooth.
- Form Balls: Once chilled, roll the dough into small balls about the size of a truffle.
- Coat with Chocolate: Dip each ball into the melted chocolate, using a fork to lift and gently tapping off excess chocolate before placing on a tray.
- Final Chill: Refrigerate or freeze the coated truffles for a minimum of 30 minutes to set the chocolate coating.
- Store: Keep the truffles stored in the fridge or freezer until ready to enjoy.
Notes
- This recipe is perfect for holiday gifting and snacking, offering a paleo and gluten-free alternative to traditional gingerbread treats.
- You can substitute coconut flour with additional almond flour if preferred.
- Be careful when melting the chocolate to prevent burning by stirring frequently.
- If you want thicker chocolate coating, double-dip the truffles or add an extra 1 teaspoon of coconut oil to the melting chocolate for smoother consistency.
- Store the truffles in an airtight container in the refrigerator or freezer to maintain freshness.
Nutrition
- Serving Size: 1 truffle
- Calories: 185 kcal
- Sugar: 14.6 g
- Sodium: 44.5 mg
- Fat: 10.7 g
- Saturated Fat: 3.6 g
- Unsaturated Fat: 7.1 g
- Trans Fat: 0 g
- Carbohydrates: 18.5 g
- Fiber: 2.9 g
- Protein: 3.9 g
- Cholesterol: 0 mg


Leave a Reply